There are a bunch of good sales tools out there, but few of them can match LinkedIn Sales Navigator when it comes to lead generation, prospecting, and lead nurturing.
I'm serious. It doesn't matter if you're a newbie sales intern, a veteran recruiter, or a B2B sales pro. You can use Sales Navigator to take your social selling game to the next level.
To help you do that, I've put together this handy article (if I do say so myself) in which I draw on my own experience, as well as the extensive experiences of eleven other sales experts, to teach you the ins and outs of this stellar tool. Cool? Then let's get started!
What Is LinkedIn Sales Navigator?
You've heard about LinkedIn, right?
It's that social media site for business professionals. You know, the one that was launched in 2003, acquired by Microsoft in 2016, and now boasts 930 million users? Yeah, that one.
LinkedIn Sales Navigator is one of the premium sales tools that LinkedIn offers. Sales reps can use it to find new leads, build relationships, and increase conversions.
Of course, to do those things, you have to know how to wield LinkedIn Sales Navigator effectively.
But first, let's dig deep into why you should become a Sales Navigator user ASAP…
 |
Who Needs LinkedIn Sales Navigator?
Who needs LinkedIn Sales Navigator? Technically speaking, nobody.
The police won't raid your home and haul you off to jail if you don't have a subscription. That said, just about every sales team can benefit from Sales Navigator, because it will:
- Help you identify potential customers
- Streamline your prospecting workflows
- Make it easier to connect with decision-makers
- Turn you into the quota crushing rockstar you want to be
How does it do these things? Simple, LinkedIn Sales Navigator gives you access to detailed search capabilities, which you can use to pinpoint red-hot buyers; personalized algorithms, which accelerate the lead-finding process, and extended InMail capabilities.
LinkedIn Sales Navigator Pricing
LinkedIn Sales Navigator is a paid subscription service, so let's talk pricing.
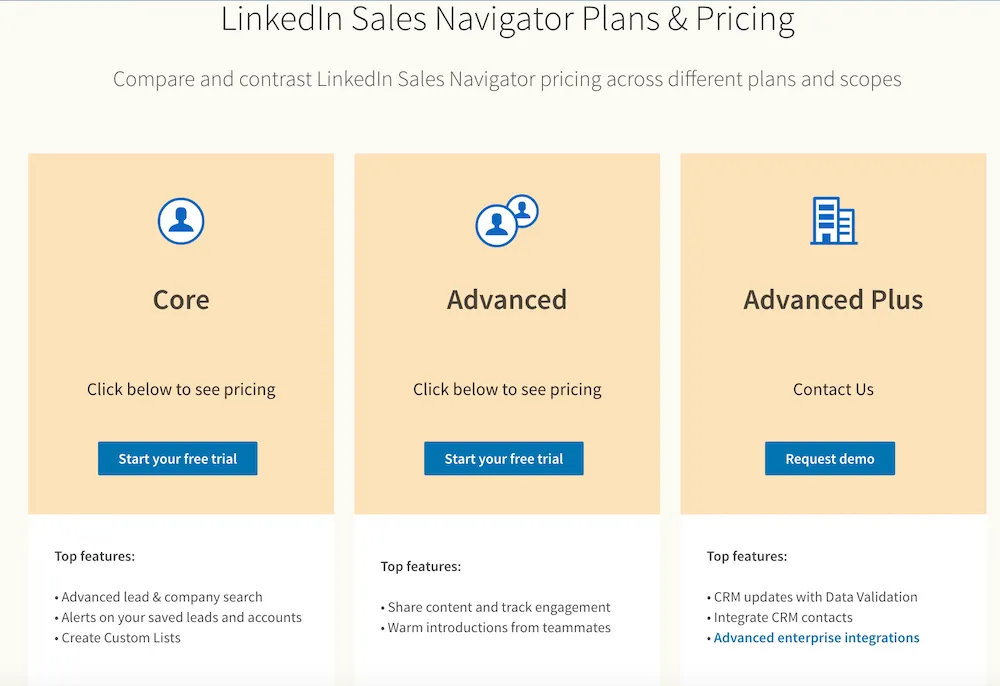
The "Core" plan will cost you $99 a month. With it, sales professionals can access advanced search functionality, create custom lead lists, send 50 InMail messages a month, and receive prospect activity notifications, which as you'll see in a bit, are kinda game-changing.
The "Advanced" plan will cost you $159 a month. It includes everything in the "Core" plan, plus the TeamLink and Smart Links features—both of which we'll discuss in a later section of this article. You'll also get access to numerous administration and reporting tools.
The "Advanced Plus" plan will cost you $1,600 a month (not a typo.) It includes everything in the "Core" and "Advanced" plans, as well as advanced CRM integrations and sync.
Just in case you were wondering, LinkedIn Premium and Sales Navigator are not the same thing. Premium is a lightly juiced LinkedIn account that helps users expand their networks, connect with recruiters, and otherwise grow their careers. Sales Navigator, on the other hand, is a powerhouse tool that helps sales professionals meet, nurture, and sell to prospects.
 |
11 Tips to Boost Sales with LinkedIn Sales Navigator
LinkedIn Sales Navigator is an awesome app—if you know how to use it. The 11 tips I share below will help you master this piece of software and become a top-level seller.
1. Optimize Your Profile
You just subscribed to LinkedIn Sales Navigator and you're PUMPED! This tool is going to help you connect with quality leads, close more deals, and earn bigger commissions.
Your excitement is warranted. But before you get neck deep in quota-crushing features, I want you to do something a little bit boring and 100 percent necessary: optimize your profile.
According to Vito Vishnepolsky, Director of the Martal Group, this is important because, "A well-optimized LinkedIn profile is the first step to getting you visible on the platform and increasing your chances of success with your proactive outreach strategy."
Basically, if your LinkedIn profile sucks, your lead gen and prospecting efforts will fall flat.
Fortunately, profile optimization is simple. Just invest in a professional headshot, use the summary section to explain the value you create while hitting specific keywords, create a detailed list of your work experience, and make sure your contact information is easy to find.
Eighty-two percent of buyers look up providers on LinkedIn before responding to outreach efforts. So don't contact your ideal customers until your profile is in tip-top shape.
Additionally, consider using Close's LinkedIn Headline Generator and LinkedIn Summary Generator. These AI-powered tools can help you craft compelling, professional headlines and summaries, ensuring your profile not only looks great but also resonates with your target audience.
2. Understand Your Ideal Customer
Who do you sell to?
If you have to think about that question for more than two seconds you've got work to do. Why? Because you should already know this group of people like the back of your hand.
Once you have intimate knowledge of your ideal customer, do what David Reid, the Sales Director at VEM, says and "Create buyer personas." Doing so will help you, "Use the sophisticated search filters in Sales Navigator to segment and locate potential clients based on relevant factors such as industry, job title, seniority level, geography, and company size."
Speaking of search filters…
3. Use Advanced Search Filters
When you know who you want to sell to, you can use Sales Navigator search to find them.
I talked to Abhishek Shah, the Founder of Testlify, who stressed the importance of Sales Navigator's advanced search functionality, saying it can be used to, "Identify leads who match your ICP criteria." You can then save searches to help, "Create targeted lists, allowing you to easily track and engage with potential customers over time." (More on this in the next tip.)
Sales Navigator is built on the Boolean search methodology, which makes it easy to refine search criteria using the words AND, OR, NOT, as well as parentheses and quotes.
If I wanted to contact sales managers, for example, I would type "Sales Manager" into Sales Navigator. If I wanted to contact sales or marketing managers, I could type in "Sales Manager" OR "Marketing Manager." And if I wanted to contact CEOs—without having to deal with gatekeepers—I could type in something like "CEO NOT Assistant."
As you can see, the Boolean methodology simplifies the searching process. The question is, what do you do with all of the leads it will help you find? Create a lead list, of course!
4. Create a Lead List
Once you tell Sales Navigator who you want to search for, the program will find professionals who fit your criteria. But remember, Linkedin has 930 million users.
Because of this, you need to be hyper-specific when you tap into the search function that Sales Navigator offers. Otherwise you'll have to wade through an avalanche of bad-fit leads.
Michael Van Gerpen, the Founder & Chief Editor of Bicycle Review Guru, says, "The key is to use as many of the search filters as possible. Although doing so will decrease the size of your list, the upside is you’ll get more targeted and better quality prospects."
When you find leads that match your ideal customer profile, add them to a lead list:
- Select the lead(s) you want to save
- Click the "Save to List" button beneath the search bar
- Choose the list you want to save the lead to
All of your saved leads can be accessed via the "Lead Lists" tab inside Sales Navigator. You can also take notes and send connection requests and LinkedIn messages from this screen.
5. Take Advantage of Lead Recommendations
LinkedIn Sales Navigator sounds pretty cool, right? Just wait, it gets better…
When I talked to Derrick Hathaway, a Sales Director at VEM, he reminded me that,
"LinkedIn Sales Navigator provides lead recommendations, based on your saved leads and sales preferences. Investigate these suggestions to find fresh potential customers."
Put simply, Sales Navigator "studies" your previous searches and prospecting preferences, then generates potential leads for you to reach out to. Imagine how much time you'll save when buyers are delivered to you, rather than you having to beat down doors to find them.
6. Use the TeamLink Feature
We need to take a moment to talk about the TeamLink Connection feature.
In the words of Will Yang, the Head of Growth & Customer Success at Instrumentl, "Sales Navigator's TeamLink feature allows sales teams to access each other's networks."
Why is this important? Because it makes it way easier to engage second-degree connections, i.e., LinkedIn users who are connected to your direct network, but not to you. Once you do this, your prospects will naturally trust you more, leading to more sales.
So, how does it work? Navigate to the advanced search feature inside your Sales Navigator account. Scroll down to the "Spotlights" section, then click the "Activities and Shared Experiences" button. Next, click the "With TeamLink Into" button in the drop-down menu.
Sales Navigator will now show you all of the prospects that are connected to your colleagues.
(Note: TeamLink is only available to "Advanced" and "Advanced Plus" plan subscribers.)
7. Reach Out to Your Leads
Once you create a list of potential customers, you need to reach out to them. There are two ways to do that on LinkedIn—connection requests and InMail messages.
A connection request is exactly what it sounds like: a request to connect with another LinkedIn user. It's pretty similar to a friend request on Facebook. An InMail message is a private message that LinkedIn users send to other LinkedIn users they aren't connected to.
Your Sales Navigator membership allows you to send just 50 InMails a month. Because of this, always send connection requests first. Then, if your request is ignored, try InMail.
Either way, take the CMO of Freelance Writing Jobs, Milo Cruz's advice and personalize your outreach. "Reference specific aspects of their profile, like shared connections and recent activities. Highlight the value you offer. Avoid generic templates and strive for authenticity."
8. Engage with Other People's Content
LinkedIn Sales Navigator is an excellent lead generation and prospecting tool, as we've just seen. But did you know it can help you with the lead nurturing process, too? It's true!
According to Diana Stepanova, the Operations Director at Monitask, "Sales Navigator allows you to see the content that your prospects are sharing and engaging with. Take advantage of this by liking, commenting on, and sharing their posts."
Why is this useful? For one thing, it will help you learn about your target audience. Prospects post things they care about. When you understand these interests and/or needs, you can use them to craft effective sales pitches that nudge prospects closer to a sale.
Engaging with potential customers' content will also keep you and your company top-of-mind. Prospects will see your likes, comments, and/or shares and think, "Oh yeah. Isn't that the person who sells XYZ? I like them. Maybe I'll reach out when I have a need."
BOOM! You just inched said prospects further into your sales funnel. And all you had to do was like a few posts, drop a couple comments, and share an article. Win!
9. Use the Smart Links Feature
Imagine this scenario…
You've been nurturing a specific lead for weeks. You know they would benefit from your company's product, but you haven't gotten them to bite yet. They've been receptive to your outreach, though, and you've been commenting back and forth on each other's posts.
Then, out of the blue, the prospect shoots you a LinkedIn message and says, "I just started a new project and I could really use a product like yours. Can you send me more info?"
This is the moment you've been waiting for. You break out into your happy dance. Then you compose yourself and… Here's an idea: send them a Smart Link.
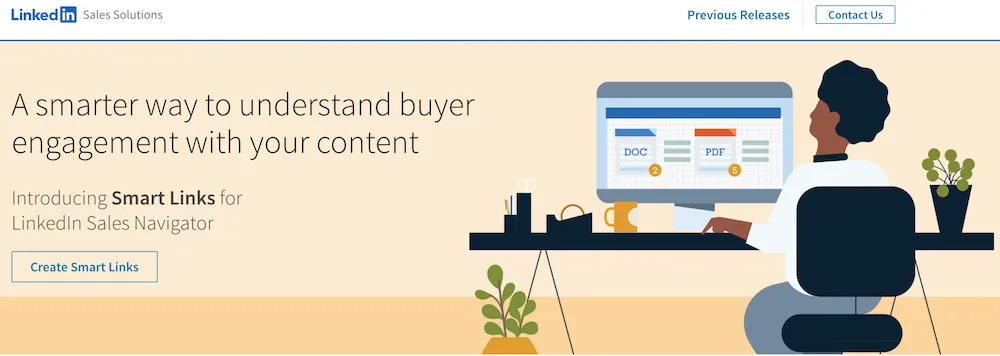
A Smart Link is a nifty LinkedIn feature that allows Sales Navigator customers to package multiple pieces of content—pitch decks, product overviews, demonstration videos, etc.—into one trackable link. Said link can then be shared through any channel of your choosing.
In the words of Ahmet Durmusoglu, a Co-Founder of ContentGo, "Smart Links make it easy to share content and track engagement metrics." He goes on to suggest, "Use this data to prioritize your follow-ups and tailor your approach based on your prospects' interests."
To be clear, Smart Links will enable you to send content to prospects, track the way they interact with said content, and then build effective follow-up plans based on the data you collect. In other words, Smart Links is a killer Sales Navigator feature you need to use ASAP.
(Note: Smart Links is only available to "Advanced" and "Advanced Plus" plan subscribers.)
 |
10. Keep an Eye on Your Notifications
I can't write an entire post about Sales Navigator without mentioning the notifications feature, which will send you real-time alerts when leads update their profiles or take certain actions.
Are your prospects writing articles? Have they been featured in anyone else's posts lately? Maybe they've recently experienced a promotion or job change. You can program Sales Navigator to notify you when these kinds of things happen, which will give you, "Something to personalize your initial outreach messages, as well as a good reason to contact them again to follow up," according to Tom Golubovich, the Head of Marketing at Ninja Transfers
Personalized messages are always better than generic ones. The alerts inside Sales Navigator make it easier to personalize outreach efforts in authentic ways that boost sales.
11. Integrate Sales Navigator with Other Tools
I want you to take a moment to think about your sales team's tech stack.
You almost certainly use a CRM solution like Salesforce, HubSpot, or Close. And you probably subscribe to a few automation tools, too, like Yesware, Zoominfo, or Chorus. Who knows? You might use a sales enablement platform like Seismic, too.
Here's the point: you should connect your tech stack to Sales Navigator. Doing so will make it much easier to use the leads you generate—especially when it comes to CRM integrations.
I was recently talking to Pauline Rouxeville, the Growth and Acquisition Manager at Napta. She told me that tools like "Evaboot, Drop Contact, and Kaspr," simplify the collection of "telephone numbers and/or e-mail addresses," which can then be sent to CRM software. "This makes it easier to prospect with all the knowledge about each profile."
Want to Crush Your Sales Goals? You Need LinkedIn Sales Navigator
It doesn't matter which version of LinkedIn in Sales Navigator you use. The tips, tricks, and expert-level hacks in this article will help you squeeze the most juice out of the tool. When that happens, you'll have more qualified leads than you'll know what to do with—guaranteed.
The question is, what will you actually do with all of those leads? If you're smart, you'll add them to a proven CRM solution like Close, then track them through your sales pipeline.
Not familiar with Close? Our platform was specifically designed to help startups and small businesses close more deals. To make that happen, we equipped Close with all of the calling, emailing, automation, and reporting tools you need to crush quota. Sign up for a free 14-day trial of Close today to experience the power of our platform for yourself.